
Using Portrait Art to Connect with Our Community
Total Class Periods to Complete: 3-4 periods
GRADE LEVEL: 5
Activator
-
Begin with the question: “How can a portrait bring people together?”
-
Encourage students to think about portraits in shared spaces (e.g., murals, community centers, galleries).
-
Show examples of community portraits and murals.
-
Play this video: Mural Artists Connecting Cultures to highlight how murals can bring people together.
Essential Questions
-
How can we connect through shared identity?
-
How does portraiture to create empathy and community?
Lesson Objectives
-
Create community portraits that celebrate diversity and shared identity.
-
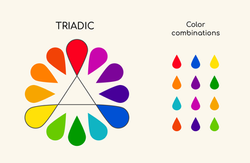
Understand and apply analogous color schemes (e.g., blue & purple, red & orange).
-
Complete a self-portrait using two analogous colors and contribute to a collaborative rainbow mural.
Georgia State Standards for Visual Arts (5th Grade):
-
VA5.CR.1: Engage in the creative process to generate and visualize ideas by using subject matter and symbols to communicate meaning.
-
VA5.CR.2: Create works of art emphasizing multiple elements of art and principles of design.
-
VA5.RE.1: Use art criticism skills to evaluate and interpret works of art.
-
VA5.CN.1: Understand how art communicates universal themes and connects with community and cultural traditions.

Lesson Materials
-
8.5x11 Bristol paper
-
Colored crayons and markers
-
Colored pencils (optional for detailed shading)
-
Color wheel handouts (one per table)
-
Large mural-size poster board (for hallway display)
-
Glue gun, painter’s tape, or staple gun
Presentation: Celebrating Diversity through Murals
Resource Artists:
-
Diego Rivera:Highlight the work of Diego Rivera and his community-focused murals.
-
Keith Haring:Introduce the street art of Keith Haring, emphasizing his use of bold colors and patterns to promote unity.
Click on the file to download.
Steps and Task Instructions
Revisit Color Theory:
-
Distribute color wheel handouts to each table.
-
Review the colors of the rainbow and explain analogous colors (colors next to each
other on the color wheel).
-
Highlight how markers create darker marks, while crayons create lighter tones.
Introduce the Project:
-
Explain that students will create a self-portrait using only two analogous colors to
contribute to a collaborative class mural.
-
Show the example used in this lesson plan of completed portraits and murals for
inspiration.
Review Facial Proportions and Design:
-
Discuss the elements of a face and review basic proportions (e.g., placement of eyes, nose, and mouth).
-
Emphasize that the background of each portrait must include a pattern with no white space remaining.
Assign Colors and Begin Work:
-
Assign two analogous colors to each table (e.g., red and orange, blue and green).
-
Students select their preferred color combination and move to the corresponding table.
-
Distribute materials (Bristol paper, crayons, markers, and colored pencils).
Make sure students:
-
Ensure the eyes, nose, and mouth are clearly visible. (Use a black marker for emphasis if needed.)
-
Shade and color the face using one of their two chosen colors. (Colored pencils can help preserve facial details.)
-
Fill the background completely with a pattern. No white paper should show.
-
Refer to Lesson 1 for more instructions.
Wrap-Up and Collect:
-
Once completed, collect all portraits and organize them by their color groups.
Mounting for Display:
-
Cover the designated mural space (e.g., hallway) with black poster board.
-
Arrange the portraits into a rainbow order based on their color schemes.
-
Secure the portraits using tape, staples, or glue.
-
Add the quote underneath the mural:
“We all should know that diversity makes for a rich tapestry, and we must understand that all the threads of the tapestry are equal in value no matter what their color.” – Maya Angelou

Click here
to download
Differentiation Options
For SPED Students and 504 Plan Students:
-
Digital Portraits: Use a digital drawing tool (e.g., Canva) to create their portrait.
-
Face Templates: Provide pre-drawn templates with simple facial proportions for support (see Lesson 1).
-
Sensory Accommodations: Provide pencil grips or adaptive tools for students with motor challenges.
-
Peer Support: Pair students with a buddy who can assist with details and pattern ideas.
Differentiation Options for Students with Dyslexia
-
Provide a step-by-step visual checklist for creating the portrait (e.g., "Step 1: Draw the face outline. Step 2: Add facial features.").
-
Include labeled visuals for facial proportions, analogous color schemes, and examples of patterns.
-
Record audio instructions or use text-to-speech tools to provide an auditory explanation of the steps and project goals.
-
Use video demonstrations (e.g., YouTube links or teacher-created videos) to guide the process visually and aurally.
-
Break the project into small, manageable tasks with clear stopping points (e.g., “Today, focus only on drawing the face and features. Tomorrow, we’ll add color.”).
-
Provide a timer or checklist for each session to help students pace themselves.
Collaboration Options
-
Group Critiques: Students work in small groups to give constructive feedback on each other's portraits, focusing on how their work contributes to the theme.
-
Partner Work: Pair students to brainstorm pattern ideas or provide mutual support with proportions and design.
-
Classroom Mural Assembly: Involve the entire class in arranging and assembling the mural into its final rainbow form.
-
Community Engagement: Invite parents or community leaders to view the mural in a hallway gallery-style showcase.
Rubric

 |
|---|
 |
 |
 |
 |
 |